
"Views" is a very important and indispensable module in building a website based on the Drupal CMS. It's hard to imagine any project developed with Drupal that doesn't utilize at least some of the features provided by this module.
I started working with Drupal in version 6. At that time, Views were already essential, and it has become increasingly important over time. In fact, with the release of Drupal version 8, Views became part of the core and ceased to be a 'contrib' module.
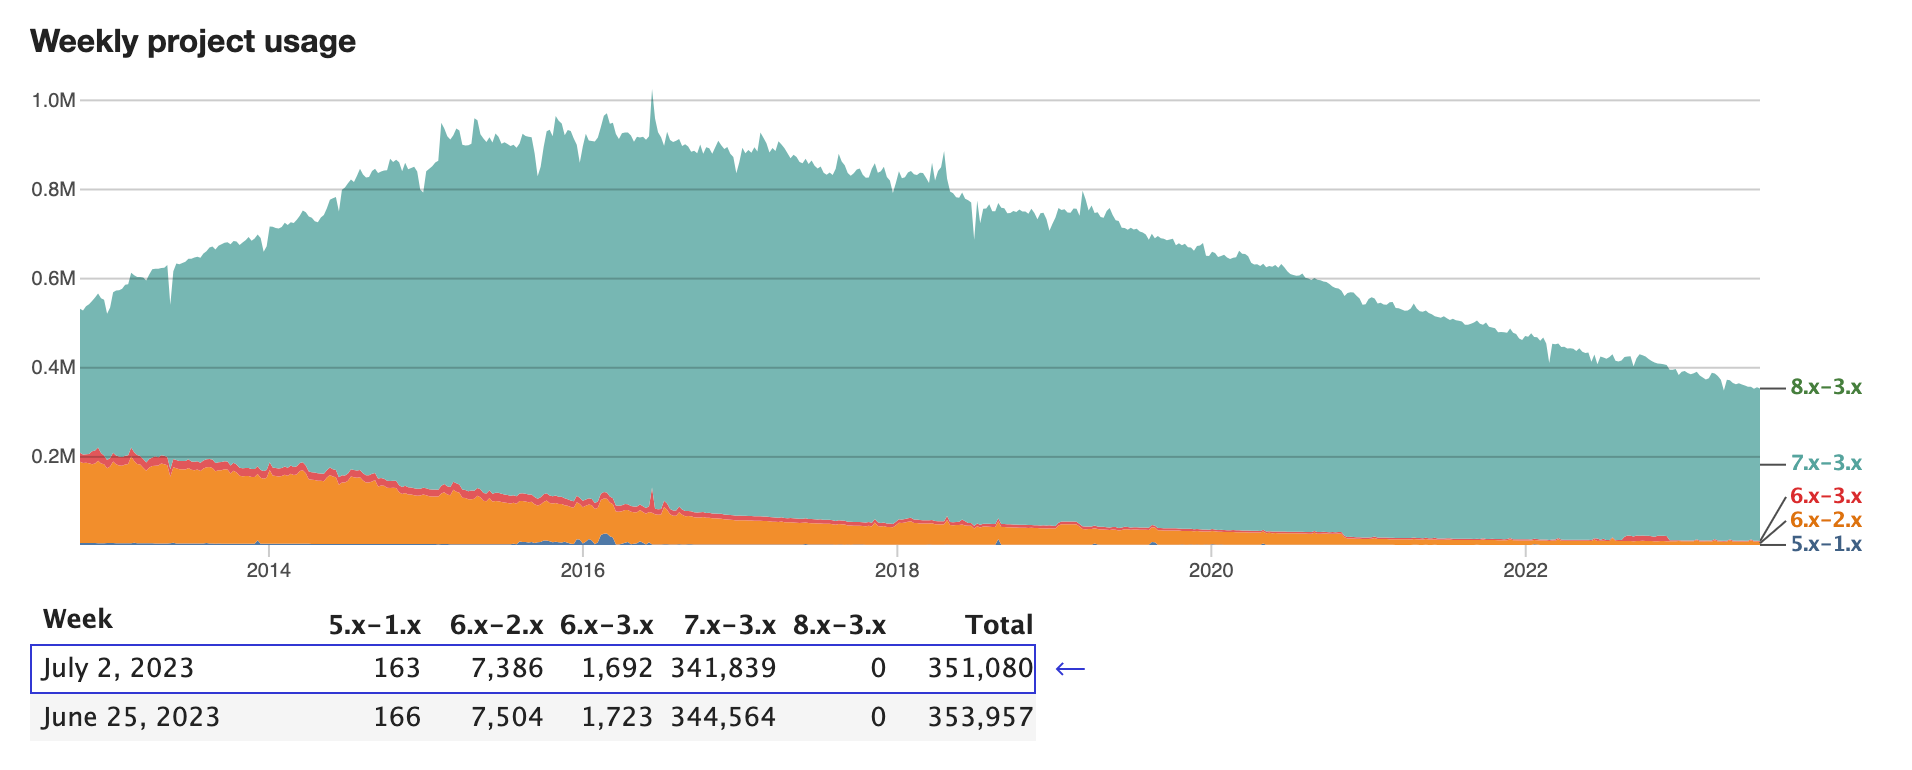
Its importance is so significant that even today, its version 7.x (www.drupal.org/project/views) is still being updated by the community and is present in over 300,000 projects, as stated on the project's page.
Why is this module so important?
As the name itself suggests, it allows us to create "views" in the form of tables, lists, grids, and many others styles. You can even create charts (using complementary modules).
In this article, we will focus on the main features of the "Views" module.
To start, we need to confirm if the following modules are active. In the installation of the default profile, they should already be activated. However, let's verify and enable them if they are not. This is how the modules will look:

After checking and enabling (if necessary), let's create our first view to help understand how it works.
Views (/admin/structure/views).
When creating the view, we have several configuration options that we can use to start building the desired visualization.
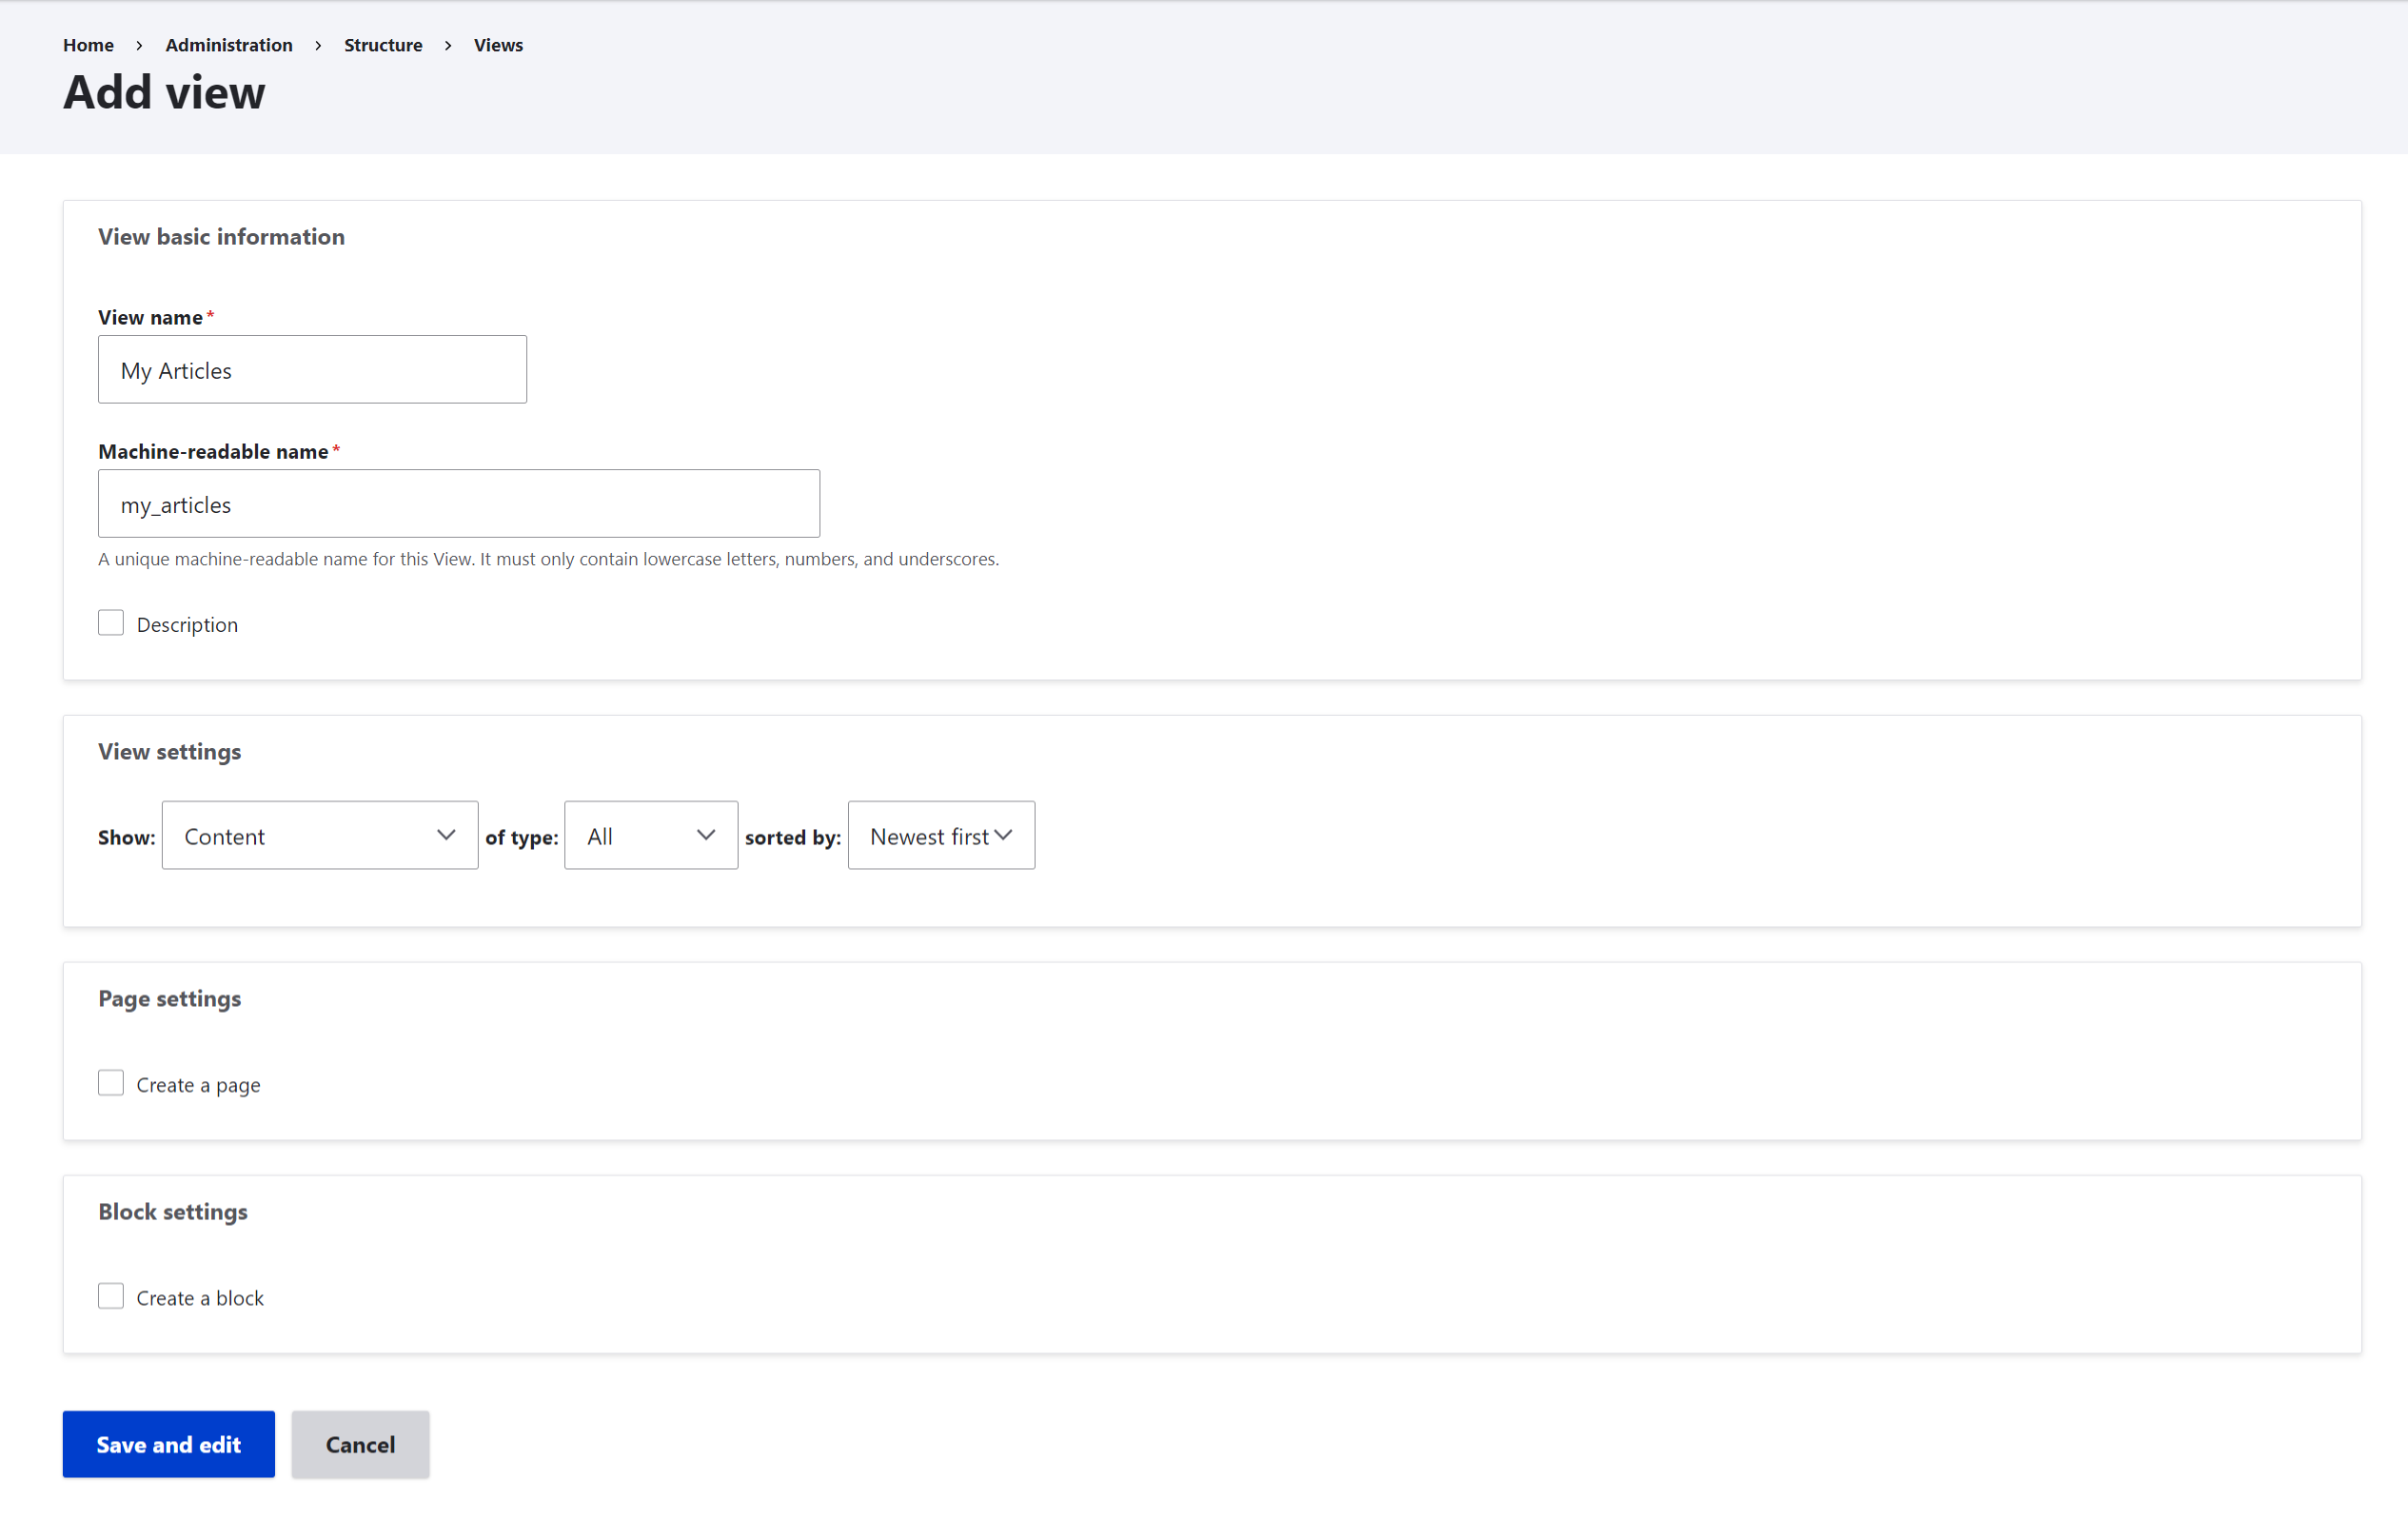
View basic information: This includes basic information about the view such as the name, machine name, and a brief description.
View settings: In this section, you can configure the entity on which the view will be based, the type of content, and the sorting order. The entity is the only value that cannot be changed after the view is created, while the other two can be modified later if needed.
Page settings: If you want a "Page" display to be created along with the view, you can check this option. Additional information will be required, such as the page URL and the number of items per pagination. These values can also be changed later.
Block settings: Similar to the Page display, you can choose to create a "Block" display when creating the view.
After creating the view, this will be the interface we see. In this image, we can see three annotations, and we will discuss them below.
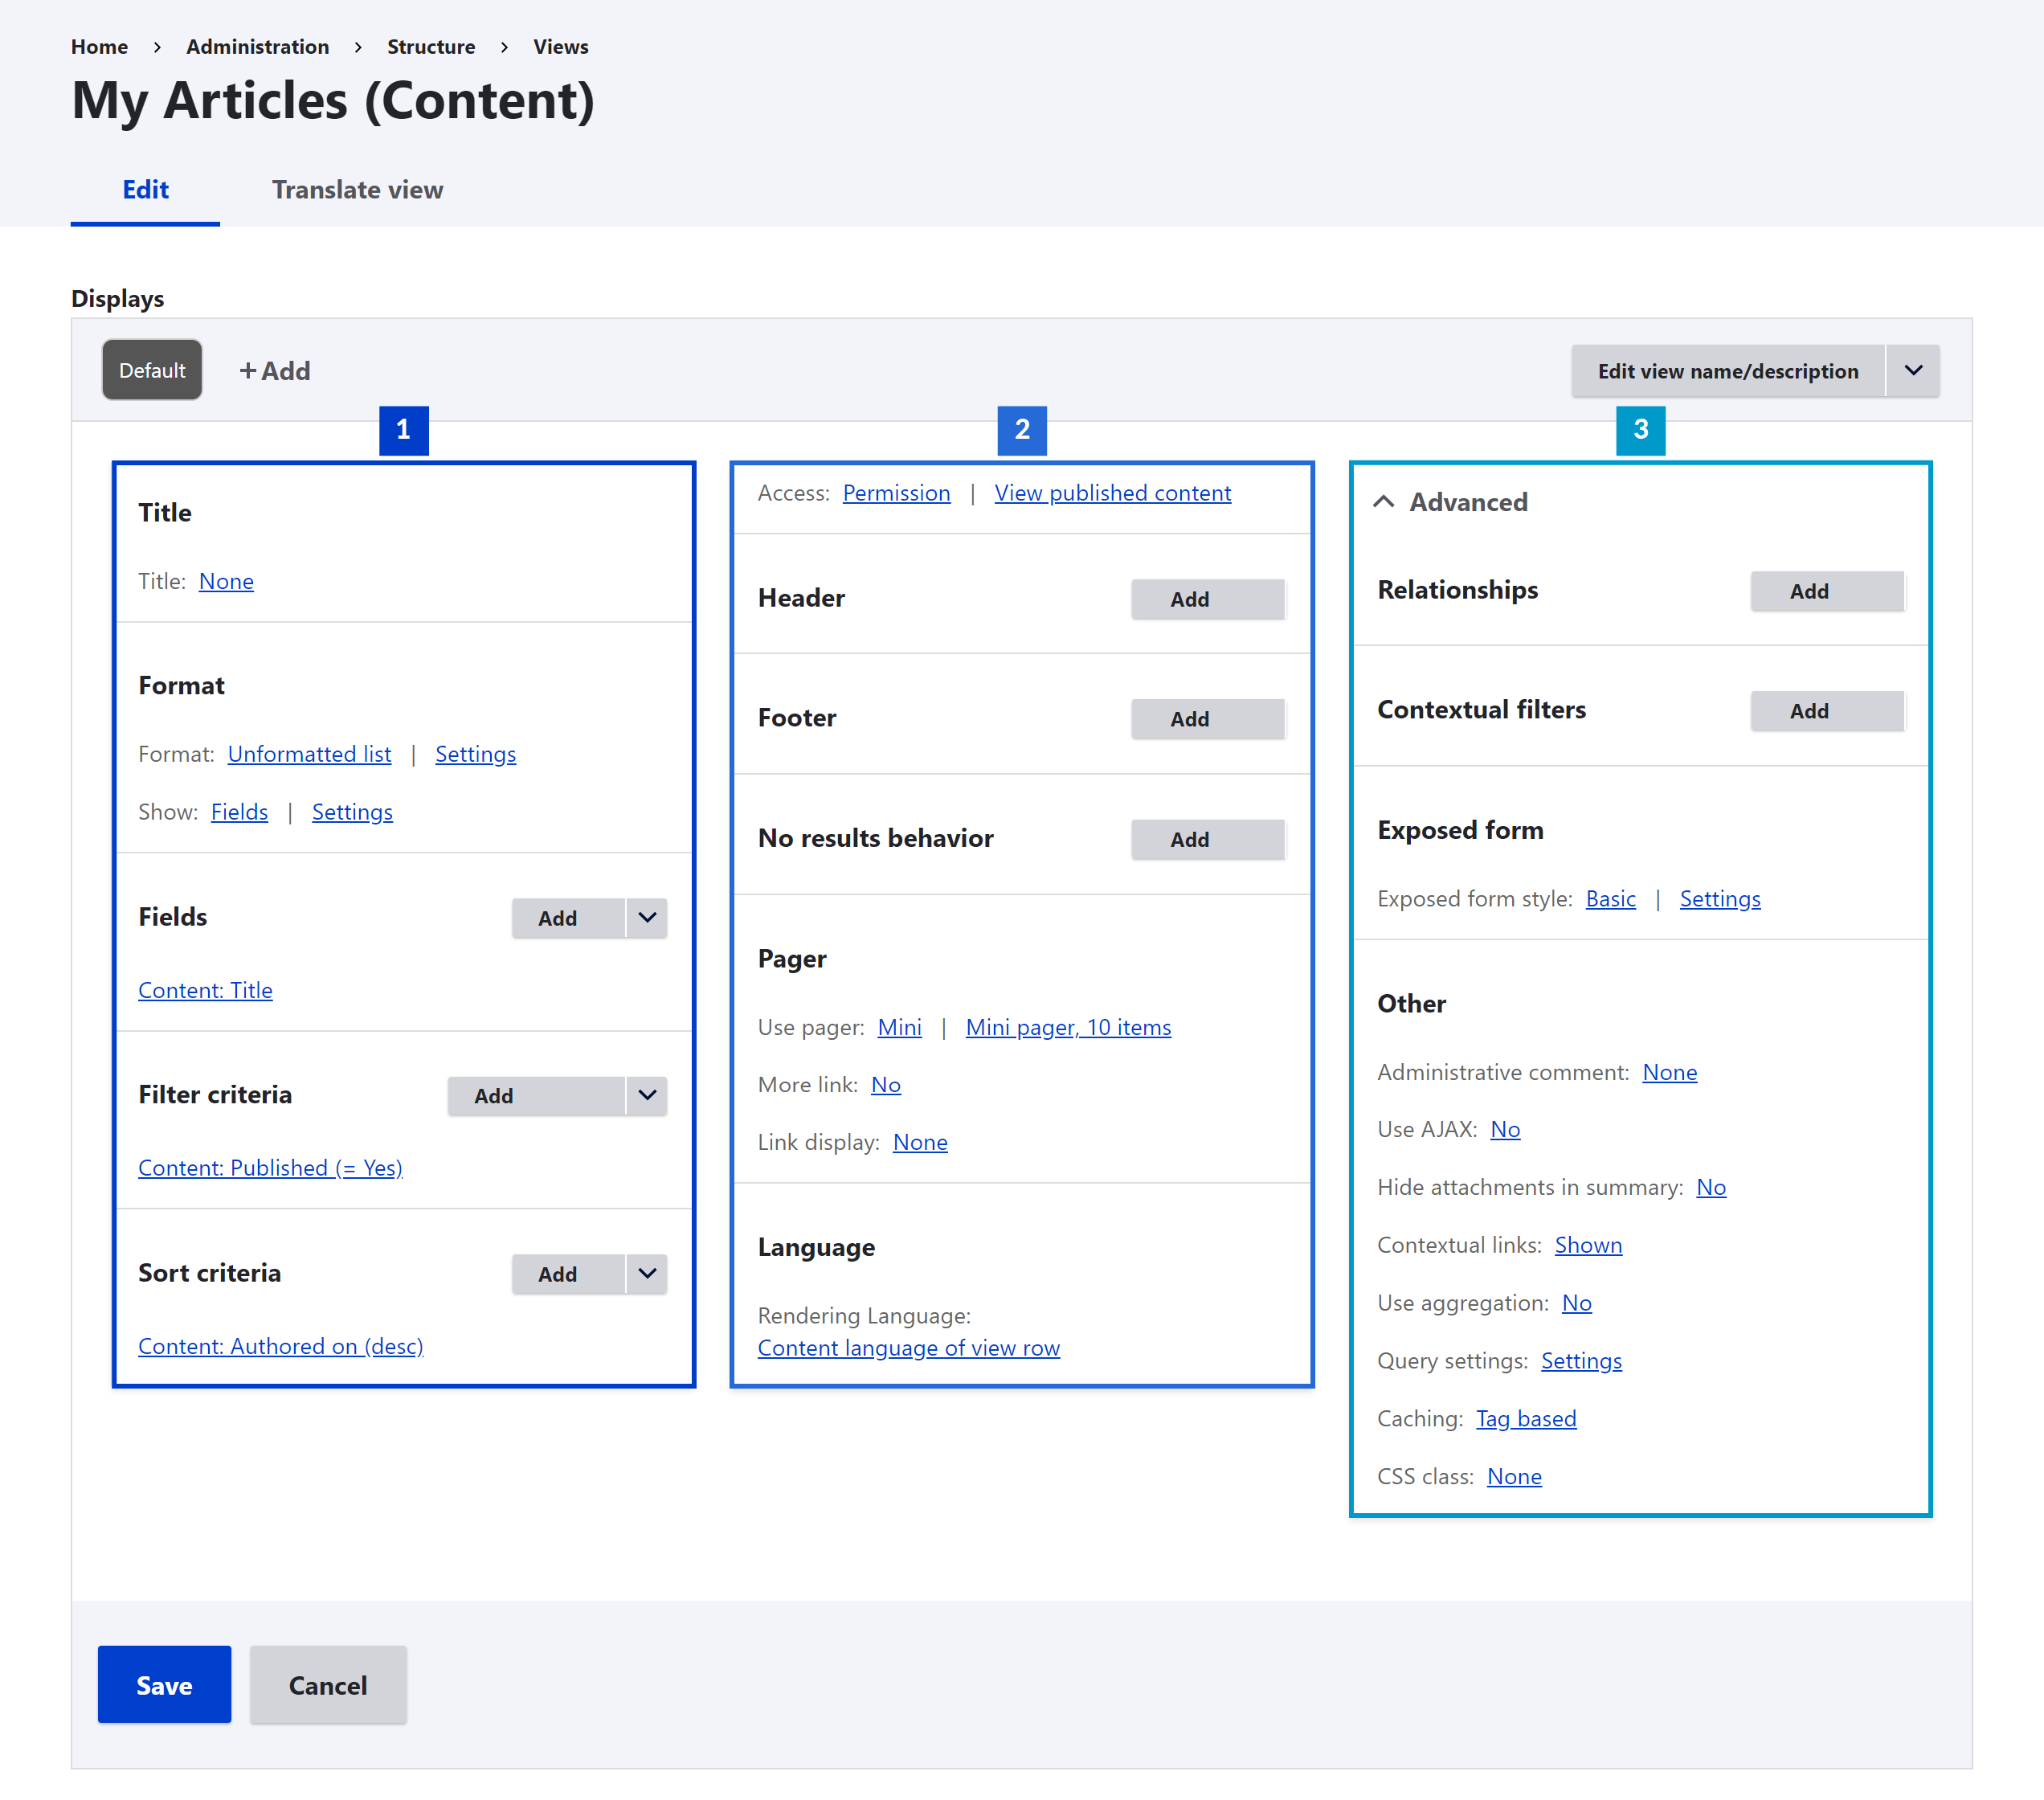
The first section represents the settings related to the content that will be listed. In this section, we can see the following:
- Title: This will be displayed as the title of a page or even as the title of a block.
- Format: This is where we choose how the information will be displayed, such as a list, table, grid, and others. We can also configure whether we want to display the content based on a view mode of the entity, or select specific fields to be displayed.
- Field: If you have chosen to display the content based on the view mode, you don't need to enter fields here, and you can leave this configuration empty. Otherwise, you need to select each field that you want to display in your view, and they will be added in this area.
- Filter criteria: This configuration is directly related to the filters you want to apply to your view to display only the desired content. For example, you can select the content type (e.g., Articles) to display only nodes of the selected type. You can also use entity fields as filters, such as a category field. Additionally, some of the items added in this section can be converted into an exposed filter. This would allow users to manually filter the content when viewing the display as a page or a block, essentially creating a search mechanism...
- Sort criteria: Finally, we have the configuration for sorting the listing. Similar to the filter criteria, here we can use entity fields as sorting criteria. We can also select whether the order should be ascending or descending.
The second section consists of additional settings for displaying the content. These configurations are not directly related to the main content but complement what will be shown on the screen.
- Access: Here, we select whether this view will have any access restrictions for users and at what level. By default, Views allows selecting restrictions based on user roles or specific permissions.
- Header: If you choose to display any content above the main content of the view, you can enter what you want to display in this option. For example, you can show a summary of the number of items being displayed in the listing or add custom text if needed.
- Footer: This option serves the same purpose as the Header configuration but will be displayed after the main content of the view, at the bottom.
- Pager: This configuration is related to pagination settings. Here, we select the number of items to display per page, and we can choose between full pagination, which shows page numbers as direct links, or compact pagination, which only provides options to go to the next or previous page.
Finally, in the third section, we can see the advanced settings. In this article, we will provide a brief explanation of each item. We will cover them in more depth in another article.
- Relationship: You may want to load information, such as a field, a filter, or a sort criteria, from an entity related to the content being listed. By using relationships, you can access the attributes of that related entity. For example, you can access the data of the content author by creating a relationship between the content (node) and the author's data (user).
- Contextual filters: This tool is used to filter the content displayed in the view using some context. For example, you can list all posts by an author on the author's page. This means that only the content created by that user will be listed when accessing any author's page. In this case, the context is the author of the content. Using only the simple filter option in the first section, we wouldn't be able to achieve this filtering rule.
- Exposed form: Some settings related to exposed filters can be adjusted here. By default, there aren't many configuration options available. For example, here, you can choose whether to display a "Reset" button to clear the filters. There are also contributed modules that provide additional functionality and expand these possibilities.
- Others: This section includes additional settings, such as adding a class to the HTML structure of the view or changing the caching rules applied to the display of this content.
Depending on the type of display you are editing, some additional options will be shown for configuration, but these will be specific settings for that display. Let's take a look at the default types of displays that can be added.
When you click to add a new display, the options you see are as follows:
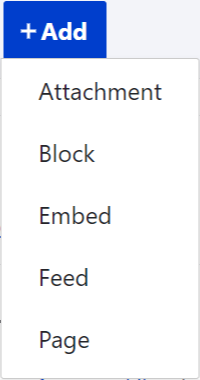
Attachment: This option allows you to create a complementary display that can be attached to a main display. The idea is that this display has additional information that can enhance the user experience. For example, we can create a display of this type that shows the most accessed content. And it can be attached to a Page display. Therefore, this attachment will always be displayed together with the main display, and you can choose whether it will be displayed above or below the main content.
Block: This display is truly fundamental for any project, perhaps as important as the Page display. With it, we can create our views and make them available as blocks. These blocks can be inserted into theme regions just like any system block. They will behave like any other block, allowing the same display rules to be applied to them.
Embed: At times, you may find the need to include a View to be rendered within your content, directly via code. Whether it's in a PHP file or a template (TWIG), it is recommended that this display be of the Embed type. Although you can include a Block or a Page directly via code, the recommendation is to use Embed because the other types have their specific purposes.
Feed: In the past, feeds were more important than they are today. It’s possible you may never use this display. Nevertheless, this Views module provides a simple way for you to make your content available through feed lists. In this display, you can also assign a direct URL to it, and the displayed content will be in XML format to ensure better compatibility with feed readers.
Page: The page display type is perhaps the most commonly used, along with the block display. This display allows us to create a specific URL for its presentation. It becomes a page within the site that can be accessed by any user, following the access rules configured for it.
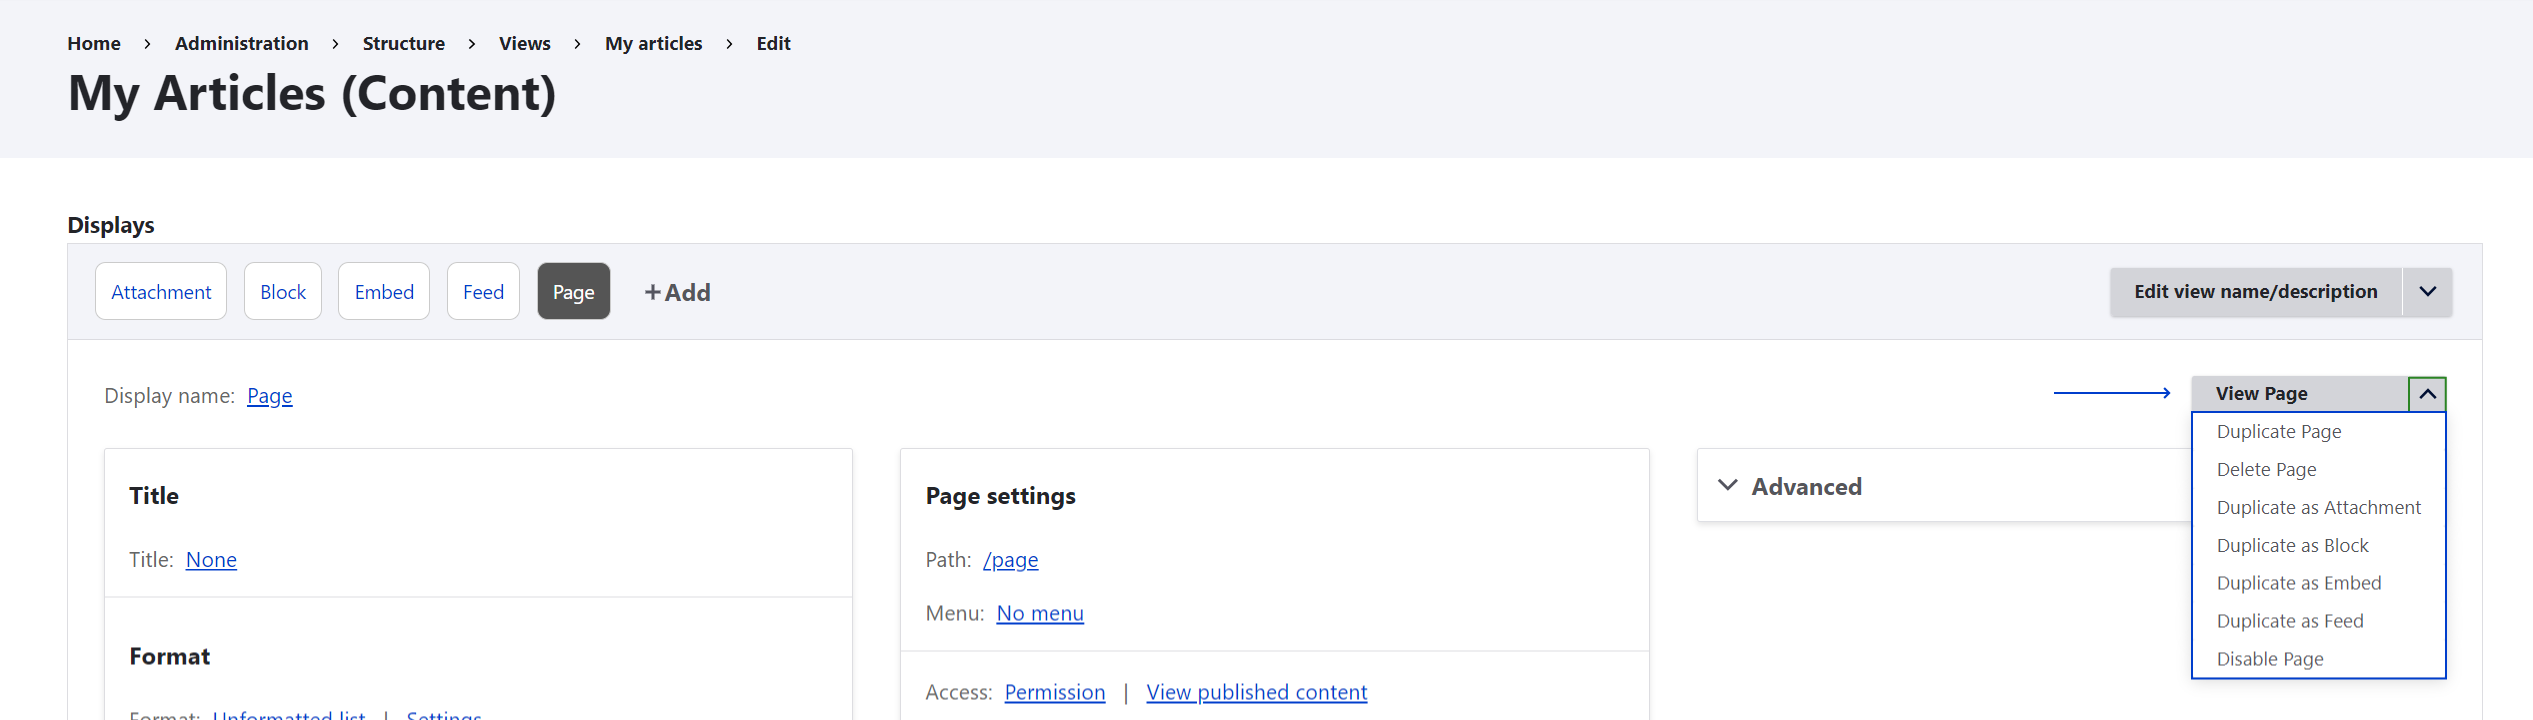
Regarding the creation of displays, there is an interesting ability to create a new display by cloning an existing one. What's even better is that we can clone a display and create a display of a different type from the original one.
"Views" is a module with tremendous potential, and there are many other complementary modules that further enhance the construction capabilities we have.
In addition to complementary modules, this module has an extensive list of hooks that we can use to manipulate various parameters to achieve the desired result.
You can find more information about the Views module on the official documentation site, or contact us if you need professional help with your Drupal website!